Computer memory test under Windows 7. Testing RAM for performance. Are there any built-in system tools?
Greetings, dear readers of my site, and I hope that your interest in this article is motivated by a desire to expand your knowledge, and not by problems with RAM. After all, our topic today is as follows: how to perform a Windows 7 RAM test.
Problems with your computer can be caused by defects that appear in the RAM over time. They can be detected using software provided by the Windows 7 system only when all chips are fully loaded.
However, I warn you right away, if you are limited in time, it is better to postpone this venture. After all, it can take you at least half an hour.
Certain security measures must be taken before the inspection.
Be sure to save the results of your work and correctly close all running and opening applications.
It would be a good idea to open this article on your smartphone or print it out. This will be the type of instruction that is always at hand.
All this is done for the reason that the RAM test will be performed when the computer is restarted, and you will not be able to use it in normal mode.
How to run a scan?
But to get to this stage you need to start testing mode. And you can do this in several ways:
- Immediately when the system starts, press F8 and go to “Troubleshooting system problems” - then “Memory diagnostics”.

- Having booted in the usual way, go through the Start menu to the search bar and type the laconic command “mdsched” in it. Press enter.
- You can also get to the Windows Memory Checker utility by going from the Control Panel, through the subsections: All Control Panel Items and Administrative Tools. The result will be similar to the previous method.

Now, having found the final goal in the form of a window checking the computer for memory problems, we will activate the “Reboot and check” button. You'll soon see a blue screen, but don't worry about it.
Initially, the Windows 7 RAM test should be carried out in the default mode. It will take some time.
At the end of the test
You should not delude yourself with a positive result, especially if the test is not carried out for the sake of prevention, but with the specific purpose of identifying the cause of failures. In this case, restart the PC again in scan mode and press F1. This will allow you to choose one of three levels of more detailed testing:
Basic (Basic) lasting several minutes.
Standard, lasting almost an hour;
Extended, requiring maximum patience from you for several hours.

Each diagnostic option differs in the number of tests involved. In the first case there are three, in the second there are eight, and in the last there are as many as seventeen. Moreover, each test is double checked. The number of such passes can be changed in the settings by setting a value from 0 to 99. There is also an option to connect the processor cache. If necessary, the verification process can be interrupted.
You will receive the following notification about a positive test result:

Features of RAM testing
I'll tell you right away. Even with an in-depth error check, you may be pleased with the results, despite the presence of obvious problems. To find out everything to the end, I recommend using a few tips:
- test each strip separately;
- If, according to the results of the check, all modules turn out to be damaged, then try to find RAM, the serviceability of which you have no doubt about. If everything is not in order with it, it means the motherboard may be damaged;
- Carry out a careful visual inspection of the RAM strips and clean their contacts from dirt.
I have nothing more to add about the Windows 7 RAM test. I hope this article will help you identify errors in a timely manner.
See you on the new pages of my blog.
In contact with
Classmates
Software for testing computer RAM ( RAM) are programs that perform detailed tests of computer memory.
The memory installed on your computer is very sensitive. It is recommended to check new, newly purchased RAM for errors. And, of course, testing is necessary if you suspect that you may have a problem with your existing RAM.
For example, if your computer won't boot or reboots unexpectedly on its own, then this could indicate certain memory problems. It is also useful to check your memory in these cases:
- programs used on the computer periodically give errors and close;
- When the computer restarts, it emits various beeps;
- displayed .
All memory testing programs mentioned in the article run outside the operating system, so each of them will work regardless of the operating system you use: Windows (10, 8, 7, Vista, Windows XP, etc.), Linux or any other. Also, remember that the term "memory" in this context means random access memory (RAM).
Important: If the test results reveal problems in the memory, it is necessary to replace it, because it cannot be repaired.
is a completely free, installation-free and very easy-to-use program for testing RAM. If you don't have time to try and compare different programs, use Memtest86 - this is the best program to test the RAM on your computer.
Simply download the ISO image from the MemTest86 website and burn it to a disc or . After that, simply boot your computer from the disk or USB drive on which the program is located.
Despite the fact that this program is distributed free of charge, it also has a Pro version, however, if you do not work professionally with computer equipment, then the free version with basic support will be enough.
To run MemTest86, you do not need to load the operating system; it is only required to write to a boot device (disk or flash drive). This can be done using any version of Windows, as well as Mac or Linux.

is a free memory testing program from Microsoft. It is very similar to other RAM testing programs, and runs a series of tests to determine problems.
Just download the installation file and create an ISO image to burn to a disk or flash drive.
After booting from a disk or flash drive, Windows Memory Diagnostic will automatically begin testing memory and will repeat the test until you stop it.
If the first set of tests doesn't find any errors, your device likely has good random access memory (RAM).
Important: To use Windows Memory Diagnostic, you do not need to install Windows (or any other operating system); you only need the system to burn an ISO image to a disk or USB device.

is a modified version of the Memtest86 program, which was listed first in this article. Memtest86+, like the original program, is completely free.
We recommend testing your memory with Memtest86+ if you have any problems using Memtest86 or it reports errors and you want to check the test results in another program (double check).
Memtest86+ is available in ISO format for burning to disk or flash drive.
It may seem a little strange that Memtest86+ is only listed in 3rd place on this list, however, since the program is very similar to Memtest86, it would be better to try the original version of Memtest86, and then Windows Memory Diagnostic, which works differently, as a result What you get is a fairly balanced algorithm for checking RAM.
As with Memtest86, to create a bootable disk or flash drive you will need a Windows, Mac or Linux operating system, which may be running on a different computer than the one you need to test.

Another RAM testing program that works very similar to those already listed earlier.
One of the main disadvantages of DocMemory is the need to create a boot floppy disk. Most computers today no longer have disk drives. Therefore, the best memory testing programs (see above) use boot disks or USB drives.
We recommend using DocMemory Memory Diagnostic only if the testing programs listed above do not work or you want to once again find confirmation that something is wrong with your memory (after checking with other programs).
On the other hand, if your device can't use disks or USB drives, then DocMemory may be just what you're looking for.
In contact with
Random access memory or RAM is one of the most important components of a personal computer. Malfunction of modules can lead to critical errors in system operation and cause BSODs (blue screens of death).
In this article, we will look at several programs that can analyze RAM and identify faulty modules.
GoldMemory is a program supplied as a bootable image with the distribution. Works without the participation of the operating system when booting from a disk or other media.

The software includes several memory test modes, can test performance, and saves test data to a special file on the hard drive.
MemTest86
Another utility that is distributed already written into an image and works without loading the OS. Allows you to select test options and displays information about the size of the processor cache and memory. The main difference from GoldMemory is that there is no way to save test history for later analysis.

MemTest86+
MemTest86+ is a revised edition of the previous program, created by enthusiasts. It features higher testing speed and support for the latest hardware.
Windows Memory Diagnostic Utility
Another representative of console utilities that work without the participation of the operating system. Developed by Microsoft, Windows Memory Diagnostic Utility is one of the most effective solutions for identifying RAM errors and is guaranteed to be compatible with Windows 7, as well as newer and older systems from MS.

RightMark Memory Analyzer
This software already has its own graphical interface and runs on Windows. The main distinguishing feature of RightMark Memory Analyzer is the priority setting, which makes it possible to check RAM without loading the system.

MEMTEST
A very small program. The free version can only check the specified amount of memory. In paid editions, it has advanced functions for displaying information, as well as the ability to create bootable media.

MemTach
MemTach is professional-level memory testing software. Conducts many tests of RAM performance in various operations. Due to some features, it is not suitable for the average user, since the purpose of some tests is known only to specialists or advanced users.

SuperRam
This program is multifunctional. It includes a RAM performance testing module and a resource monitor. The main function of SuperRam is RAM optimization. The software scans memory in real time and frees up space not currently being used by the processor. In the settings you can set the limits at which this option will be enabled.

Errors in RAM can and should cause problems with the operating system and the computer as a whole. If you suspect that the cause of the failure is the RAM, then you need to test using one of the programs given above. If errors are detected, sadly, you will have to replace the faulty modules.
When the blue screen of death appears on your device monitor, it’s time to think about checking the RAM. In addition, the RAM must be tested if the computer reboots on its own or freezes.
Standard tools will help you check RAM on Windows 7, but if you are using a different version of the OS, you will need to download a special program from the Internet. Almost always software failures, which at first glance seem illogical, turn out to be related to RAM problems.
Elimination method
The first verification option does not involve launching additional utilities. It is possible when several sticks of RAM are used. If there is only one, you will need to use an application or another device to check. It is necessary to remove the RAM strips one by one and look at the overall stability of the system. This option is good because it allows you to check the motherboard slots at the same time. If one of the boards functions normally in another device without causing failures, it is quite possible that the cause of the failure is the system board. When, after removing one stick, the computer starts to work normally, it is that stick that is faulty. Therefore, the Windows 7 Memory Test Tool does not need to be run.
It is worth noting that physically removing the strips does not take much time, but checking when using special programs is a longer process. This especially applies to situations where the amount of RAM is large. If you installed a completely new memory module and the blue screen remains even when loading into the BIOS, it is possible that the processor or motherboard does not support the original manufacturer's device. In this case, you need to check the official website of the company that is the manufacturer of the motherboard. You may need to update the latest BIOS firmware.
How to check RAM in Windows 7?
To run a built-in program that can test RAM, you must do the following:
1. Go to “Start”.
2. Go to “Control Panel”.
3. Open Administrative Tools and select Windows Memory Checker.
You should be extremely careful. Before performing the scan, you will need to close all applications and save important documents. When you click on the “Reboot” button, all programs that require additional actions from the user will be forced to end. Next, the computer restarts, after which RAM testing automatically starts. It is performed in two stages. They take a small amount of time if the amount of RAM is two gigabytes and the memory is working. Otherwise, the verification may be delayed. During the testing period, it is recommended to refrain from unnecessary clicks on buttons. If RAM defects are detected, error information will appear at the bottom of the screen. After the Windows 7 scan is completed, the computer automatically restarts and a report is generated on all RAM problems that the system found.
Memtest86+
It is worth noting that identifying problems with RAM using Windows 7 tools does not always show high efficiency. To perform more serious and in-depth tests, you will need to use the Memtest86+ program. It is presented in a free version and can be easily used on any device with any operating system. The program is available in three versions:
Bootable ISO (designed to create a bootable disk by burning an image with a CD or DVD drive;
Auto Indtaller For USB Key (not always suitable for older devices);
Pre-Complied for Floppy (an archaic solution for those who do not have USB sockets or a CD writer, but do have a floppy drive).
Creating a bootable USB flash drive
You need to go to the official Memtest86+ website and download the required distribution. After this you will need to unzip it. For these purposes, it is suggested to use 7-zip or the well-known Winrar. When the program launch is completed, you need to select the drive that will become bootable.
Bootable CD/DVD
Sometimes it is impossible to check RAM from a flash drive. The system malfunctions when using a specific flash drive driver. There are also situations when the drive may not be at hand, the BIOS is outdated and is not capable of booting the device from USB devices. In such cases, you have to burn the distribution to disk. The Ultra ISO program is designed for this. Once it is installed, double clicking on any ISO file opens it in this application. Then you need to select the tools menu and the “Burn image” item. Memtest86+ is a small program, so recording will be carried out very quickly.
Memory test
After the distribution package is written to a flash drive or disk, you need to go to the BIOS. This must be done while turning on the computer by pressing the “DEL” button. When the program is launched, you should select the flash drive or CD-ROM you are using in the First Boor Device column. When all steps are completed correctly, the reboot is followed by an automatic memory check. The utility performs nine different tests, but after they are completed, the program goes into a loop and starts all over again. As a rule, the first two or three successful tests make it clear that there are no problems with the RAM.
Prevention
Often, operating system failures are caused by dust on the system unit. In this case, OS testing is not required. It is necessary to blow through the entire internal space of the device, paying special attention to radiators and slots. It is advisable to remove all devices, excluding the processor, from their sockets and thoroughly wipe the contacts. You should be careful with microcircuits, as the slightest damage to them can lead to malfunctions.
Problems with random access (physical) memory (hereinafter referred to as RAM) can cause many problems. If your personal computer often freezes, a blue screen appears - this may be due to internal errors in the RAM. In this case it is recommended test. For this purpose in Windows there is special utility, which will be discussed in this article.
As a rule, when problems are suspected, the operating system independently launches the necessary check. However, users can run the test manually.
Running testing through the Start menu
In standard " Control panels» Windows 7 does not have sections dedicated to testing RAM. However, users can run the test using the built-in search in the " Start" To do this, do the following:
After these steps, your personal computer will immediately restart and RAM testing will begin.
Launch using the Run dialog
An alternative option is to run RAM diagnostics for errors. Allows you to start testing RAM without having access to a mouse or touchpad.
Follow the instructions:

Running an error test manually
If, on the contrary, you do not have access to a keyboard, you can launch this application through Windows Explorer:

After rebooting the computer
After your PC is rebooted, it will launch " RAM Diagnostic Tool" You don't have to press anything - the scan will start immediately.

For experienced users! If you understand how RAM works and understand how the test is carried out, you can call up the settings menu and set your own parameters. To do this, use the F1 key. Here you can change the following configurations:

Control here is only using the keyboard: using shooter You can select the desired value and use the Tab key to move to the next characteristic. When you're done with your settings, press F10 to start checking for errors.
Report
When testing is complete, the computer will restart again. Windows will generate a report of all errors found. You can familiarize yourself with it and show it to service center employees or computer specialists.
Additional software
In addition to the standard solution from Microsoft, users can download other testing programs from third-party developers. The most popular such application is Memtest. It can be downloaded for free from the official website http://memtest86.com/.
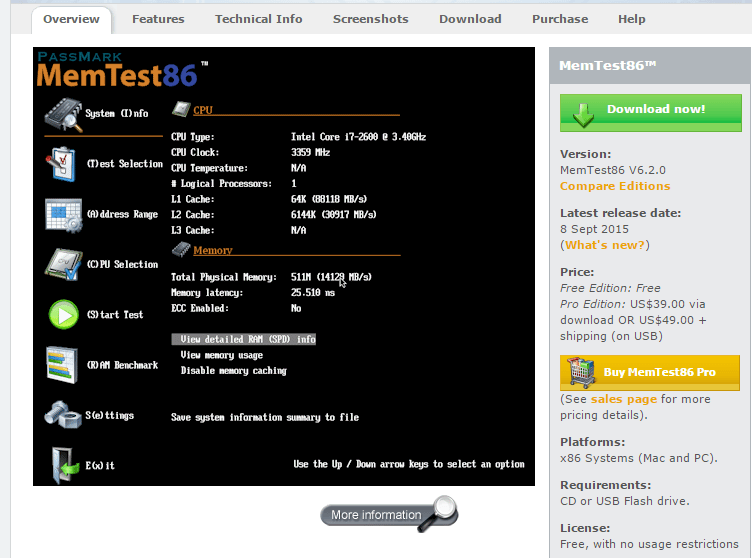
Upload the image using the " Download now!" and create a bootable USB flash drive. After this you can run the utility MemTest86 on any personal computer (even one on which the operating system does not run) and perform all the necessary checks.
Video on the topic